This into that: Taking Food To A New Height
Published 12:00 am Monday, July 19, 2010
- This into that: Taking Food To A New Height
Last year in September my husband turned forty on Labor Day so I decided to have a big outside party to celebrate both occasions. What was I thinking? Of course, it decided to rain and I had to go to plan b. After all of the chaos, I told myself never again but I love to get with friends and family so it looks like I’m planning another party. I love to look through magazines for party planning ideas and inspiration and I’ve noticed a lot of pictures in magazines display buffet tables with different elevations of food. It definitely makes it more interesting than everything just being flat on the table and it’s easier to see what you have to choose from. I think how you present your food is just as important as how it tastes. I’ve been told that you eat with your eyes first and I would say that I agree.
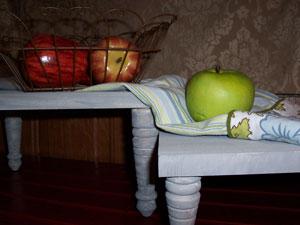
Since I’m giving myself a little extra time this year to plan our gathering, I was inspired to make some food display pedestals to help elevate the food that I will be serving on the buffet table. As you know from previous articles, I like to make things that are simple and easy and the same is true with this project. To construct my food display pedestals, I used the following supplies: two 10” x 12” pieces of wood, four 3” table legs with screws, four 6” table legs with screws, drill, sandpaper, paint, paintbrush, water and a cup. The first thing you will need to do is to pre drill holes into the bottom of each piece of wood. Next you will need to lightly sand all of the pieces of wood which will get rid of any rough surfaces and it will also help the paint to adhere. You will then screw the four 3” table legs into one piece of wood and then screw the other four 6” table legs into the second piece of wood. Put one third water and two thirds paint into the cup and use your brush to apply all over. I wanted my food display pedestals to look aged so I chose to give them a white wash effect to help achieve this desired look. If you prefer, you can leave the water out and apply the paint with a thicker consistency. Either paint technique will look great. Allow two hours for the food display pedestals to completely dry. I suggest putting your food in a dish or placing it on a towel to display it so it’s not touching the paint directly.
The possibilities with the food display pedestals are endless. They will go with any party theme or décor and you can make them in any size, height or shape. Get creative and use them for more than just food. They will work great as a display for candles, toiletries and much more. The next time you have a gathering whether it’s big or small, get creative with your food display. Even if the food doesn’t taste good, it will definitely look pretty!
About the author: Carleigh Carmichael is a local writer who’s philosophy is “Why buy it for more when you can make it for less?”.